Custom Linux Board Bring-Up: From Power Rails to the Application
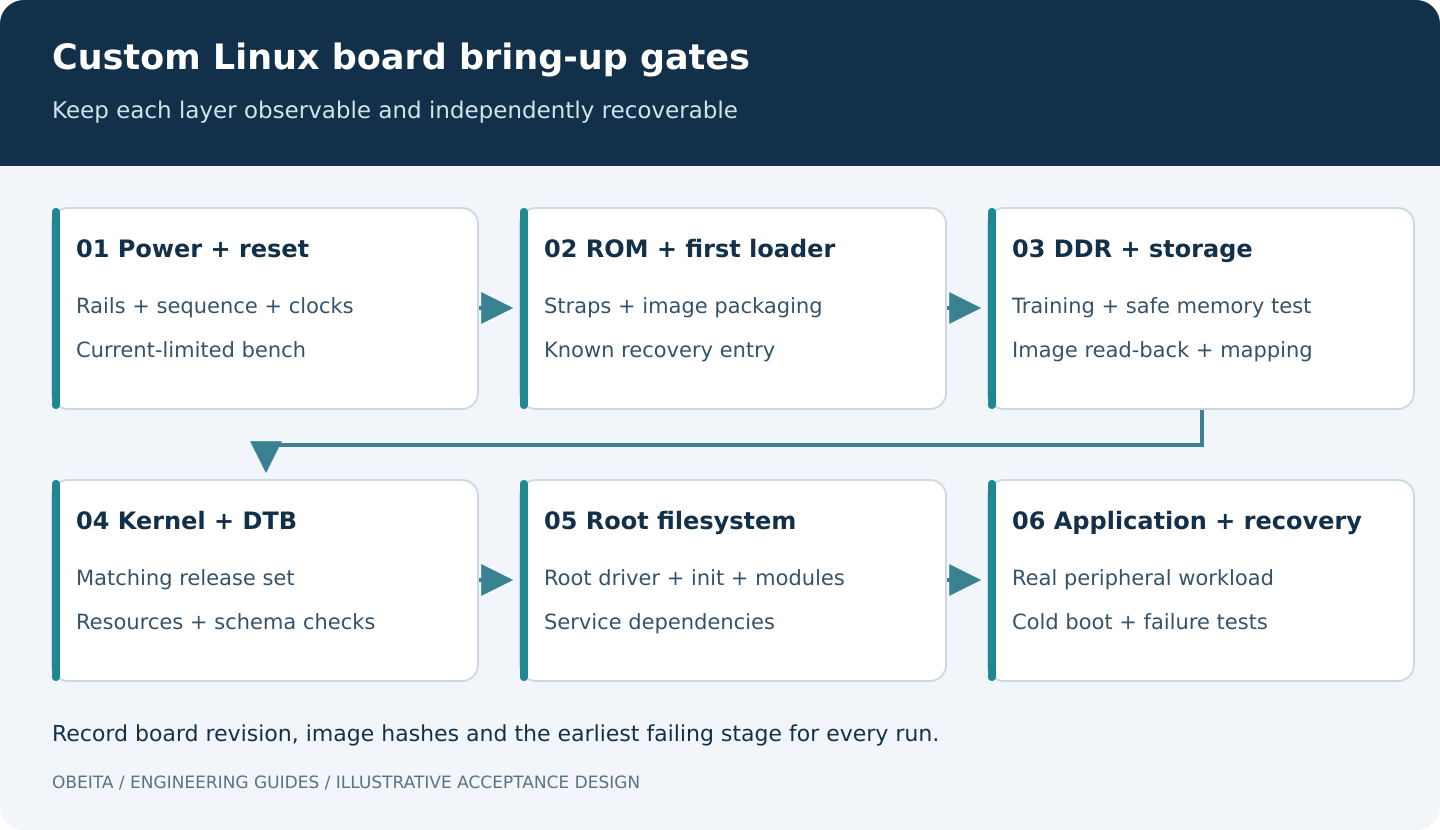
A custom Linux board is not brought up simply because it prints a login prompt. The useful milestone is a repeatable chain from valid power and reset behavior to a verified boot image, working peripheral drivers and an application that can recover from its expected failures.
This guide describes a staged bring-up plan for device-tree-based embedded Linux boards, especially ARM and AArch64 designs. The actual SoC boot ROM, power-management IC, DDR initialization package and vendor BSP determine the detailed sequence. The tests below are proposed engineering checks, not measured results for a particular product.
1. Prepare the evidence and the recovery path
Before applying power, collect schematics, assembly revision, bill-of-material substitutions, power-tree information, DDR topology, boot-strap settings and connector pinouts. Compare the populated board with the reference design rather than assuming the layout is electrically equivalent. Confirm which debug pins are actually accessible after assembly.
Prepare a current-limited supply suitable for the board, instruments with appropriate voltage ratings, a verified serial adapter and the vendor-supported recovery method. A TTL UART must match the board’s voltage domain; an RS232 adapter is not interchangeable. Disconnect uncontrolled loads and check for unintended power paths through USB or debug connectors.
Create a bring-up log indexed by board serial number, hardware revision and image hash. Save complete serial captures from power application onward. Record jumper settings and whether a run is a true cold start or a software reboot. This prevents a retained peripheral state from being mistaken for a successful initialization sequence.
2. Establish power, reset and clocks
Check resistance and obvious assembly problems before powering the board, following the hardware team’s procedure. Once powered, verify rail levels and sequencing against the selected parts’ specifications. Capture reset release relative to supply stability and clock availability. A multimeter reading alone cannot establish startup sequencing or rule out a short transient.
If current consumption is unexpected, stop and investigate before repeatedly booting. If there is no serial output, verify voltage levels, pin mux assumptions, baud rate and the selected boot source. Some boot ROMs do not print a banner at all. Use documented recovery enumeration or other vendor indicators to distinguish “ROM is running” from “the UART is silent.”
Do not patch around an electrical problem with arbitrary software delays. A delay may help localize a sequencing issue, but the final requirement should name the actual dependency and its allowed timing.
3. Prove the first loader, DDR and boot storage
Identify every executable stage in the boot chain. Depending on the platform, ROM may load an SPL, a vendor DDR initializer, secure firmware and then U-Boot. Record their versions and packaging offsets. A board can appear to have a Linux problem when the wrong DDR training component was packaged into the image.
Use the vendor-supported DDR validation procedure and safe memory tests before stressing the application. Avoid destructive tests over the running loader, reserved firmware regions or diagnostic buffers. Repeat cold boots across the agreed operating conditions. A successful warm boot does not demonstrate cold DDR initialization.
For eMMC, SD or other storage, verify enumeration, capacity, bus settings and partition mapping. Compare read-back data with the programmed image using a documented non-destructive path. If failures appear only at a faster bus mode, investigate signal integrity, voltage switching, timing configuration and driver support before accepting a permanently reduced speed as the solution.
4. Hand the right hardware description to Linux
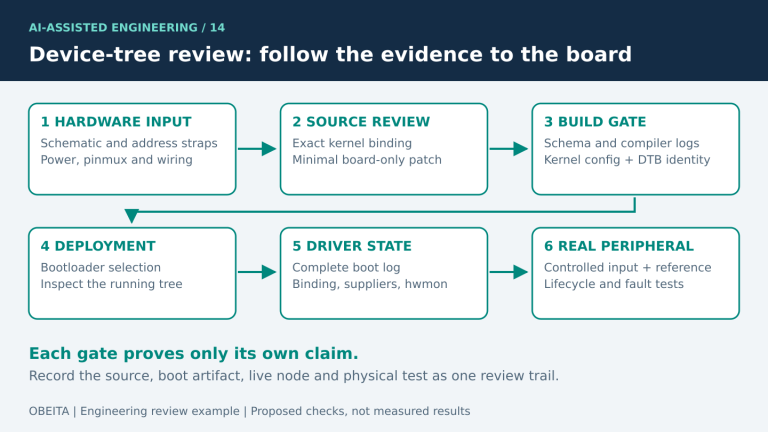
Device tree describes hardware topology and resources; it does not create a missing driver or repair incorrect wiring. Match clocks, regulators, reset lines, interrupts and pin configuration to the assembled board. The Linux device-tree usage model explains its role in identification, runtime configuration and device population.
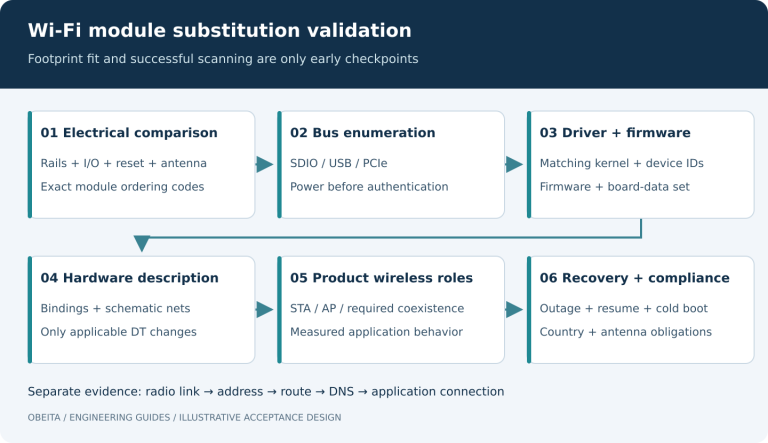
Keep the kernel, DTB, modules and firmware files in one versioned release set. A DTB left over from a reference board may boot while silently describing the wrong power supply or interrupt. Validate schemas available in the selected source tree. The kernel’s binding documentation describes the distinction between checking schemas and checking DT data.
# Run in the configured kernel source tree with its required tooling.
make dt_binding_check
make dtbs_check
These checks find structural and binding problems; they do not prove that the board wiring matches the description. Vendor kernels may have older schemas or undocumented extensions. Record such differences instead of removing warnings without understanding them.
For AArch64, bootloader handoff also has architectural requirements for image placement, device tree and processor state. Use the kernel’s AArch64 boot protocol for the selected kernel rather than transferring load addresses from an unrelated board.
5. Separate kernel readiness from root-filesystem readiness
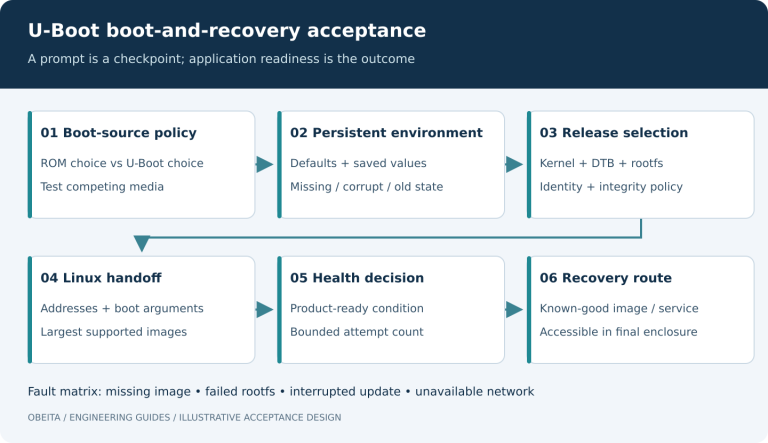
When the kernel starts but cannot mount its root filesystem, verify the root identifier, storage driver availability, filesystem support and initramfs assumptions. A driver built only as a module cannot help mount the filesystem containing that module unless an earlier userspace stage loads it. Preserve the first error message, not just the final panic.
After userspace starts, confirm the expected init process, writable locations, device permissions, time initialization and service dependencies. Verify that the running kernel, modules and application correspond to the release manifest. Do not interpret an SSH login as proof that all storage, network and peripheral requirements are satisfied.
6. Bring up one peripheral path at a time
Build an interface table connecting connector labels to Linux device names, driver names and application roles. For each device, test enumeration, basic operation, expected load, disconnect behavior where supported and restart behavior. A display needs panel timing and backlight control; a touch controller needs its own interrupt and coordinate validation. One working part does not validate the other.
When a device fails to probe, inspect the first dependency error: missing regulator, clock, reset or firmware can create later symptoms that look like a driver defect. Use targeted debug output rather than enabling every message. Linux dynamic debug can select supported debug call sites by module, file or function when the kernel is configured for it.
7. Test recovery before handing over the application
- Boot with an intentionally unavailable optional peripheral and check that required services still reach their defined ready state.
- Disconnect the test network while the application is active, then verify bounded retries and recovery without duplicating commands.
- Use a controlled test partition to exercise full-storage behavior. Confirm that logging cannot consume all space needed by the application.
- On a recoverable bench unit, exercise the agreed interrupted-update and corrupt-image scenarios without overwriting the only recovery route.
- Repeat cold boot, warm reboot and required suspend/resume cycles, recording the exact conditions and failures.
If persistent crash logging uses ramoops, reserve the appropriate memory and verify that the selected reset path preserves it. Ramoops is not a guarantee against power-loss data loss; see the kernel’s ramoops documentation. Acceptance evidence should state what was captured and what remains untested.
A concrete scope for board bring-up
Obeita’s RK3566 Embedded Terminal and BSP Adaptation project configuration describes a panel-specific terminal with FPC-connected peripherals. Its page explicitly distinguishes routed interfaces from interfaces that would need a board revision. That is the right boundary for a bring-up plan, rather than assuming every SoC feature is available on the assembled product.
For a Firmware and BSP Diagnostics assessment, provide the board revision, schematic, complete cold-boot log, image manifest and the earliest failing stage. A clear stage boundary usually gives a more actionable starting point than “Linux does not work.”